SNMPv3 is similar to SNMPv1 or SNMPv2 but has a completely different security model. SNMPv1 and SNMPv2 use a community-string that is used as the password and there’s no authentication or encryption.
SNMPv3 is able to use both authentication and encryption and has a new security model that works with users, groups and 3 different security levels. Users will be applied to a group and access policies will be applied to a group so that you can determine what groups have read or read-write access and which MIBs (Management Information Bases) they should be able to access.
Security Levels
SNMP offers 3 different security levels:
- noAuthNoPriv
- AuthNoPriv
- AuthPriv
Auth stands for Authentication and Priv for Privacy (encryption).
- noAuthNoPriv = username authentication and no encryption.
- AuthNoPriv = MD5 or SHA authentication but no encryption.
- AuthPriv = MD5 or SHA authentication AND encryption.
SNMPv1 and SNMPv2 only support noAuthNoPriv since they don’t offer any authentication or encryption. SNMPv3 supports any of the three security levels. When you decide to use noAuthNoPriv for SNMPv3 then the username will replace the community-string.
The community-string for SNMPv1 and SNMPv2 is send in clear-text. SNMPv3 is far more secure because it doesn’t send the user passwords in clear-text but uses MD5 or SHA1 hash-based authentication, encryption is done using DES, 3DES or AES.
Let’s take a look at a simple SNMPv3 configuration example on a Cisco IOS router.
Configuration Example
First we’ll create a new group and select a security model:
R1(config)#snmp-server group MYGROUP ?
  v1   group using the v1 security model
  v2c  group using the v2c security model
  v3   group using the User Security Model (SNMPv3)
We’ll call our group “MYGROUP” and of course we will select SNMPv3 as the security model. Next step is to select the security level:
R1(config)#snmp-server group MYGROUP v3 ?
  auth    group using the authNoPriv Security Level
  noauth  group using the noAuthNoPriv Security Level
  priv    group using SNMPv3 authPriv security level
By using the priv parameter we will select the AuthPriv security level. There are a number of options for security levels:
R1(config)#snmp-server group MYGROUP v3 priv ?
  access   specify an access-list associated with this group
  context  specify a context to associate these views for the group
  match    context name match criteria
  notify   specify a notify view for the group
  read     specify a read view for the group
  write    specify a write view for the group
  <cr>
The first item is the access-list, you can use this to select what IP addresses or subnets should be permitted for users. Optionally you can select certain views:
- If you don’t specify a read view then all MIB objects are accessible. Use this if you want to limit the number of MIBs that your NMS (Network Management Software) can monitor.
- Without a write view then nothing is writable, you will have read-only access.
- The notify view is used to send notifications to members of the group. If you don’t specify any then it will be disabled by default.
To keep this example simple we won’t use any views for now, this means that we’ll have full read access to all MIBs:
R1(config)#snmp-server group MYGROUP v3 priv
The next step is to create a user account:
R1(config)#snmp-server user MYUSER MYGROUP v3 auth md5 MYPASS123 priv aes 128 MYKEY123

Configuring snmpv3 USM user, persisting snmpEngineBoots. Please Wait...
We’ll create a new user called “MYUSER” and assign it to the “MYGROUP” group. We use SNMPv3 as the security model and use MD5 for authentication. This user will use “MYPASS123” as the password. Encryption is done using AES 128-bit and the encryption key is “MYKEY123”.
This router is now SNMPv3 enabled and we can monitor it using SNMPv3 from a NMS. Let’s try if we can get access…
Verification
User accounts are not stored in the configuration, take a look below:
R1#show running-config | incl snmp
snmp-server group MYGROUP v3 priv
Above you only see the group configuration, user accounts can be found with another command:
R1#show snmp user

User name: MYUSER
Engine ID: 800000090300C200128F0000
storage-type: nonvolatile  active
Authentication Protocol: MD5
Privacy Protocol: AES128
Group-name: MYGROUP
Here you can see the username, security options and to which group the user belongs. We can also check the group configuration:
R1#show snmp group
groupname: ILMI                             security model:v1
readview : *ilmi                            writeview: *ilmi
notifyview: <no notifyview specified>
row status: active

groupname: ILMI                             security model:v2c
readview : *ilmi                            writeview: *ilmi
notifyview: <no notifyview specified>
row status: active

groupname: MYGROUP                          security model:v3 priv
readview : v1default                        writeview: <no writeview specified>
notifyview: <no notifyview specified>
row status: active
Above you can see that we have our group called “MYGROUP” and that we use the default read view. If you are a Linux user you can use the excellent snmpwalk command-line utility that tests if your router can be accessed using SNMP. It works for SNMPv1, v2 and v3:
rene@linux ~ $ snmpwalk -v3 -u MYUSER -l AuthPriv -a md5 -A MYPASS123 -x aes -X MYKEY123 192.168.82.138
iso.3.6.1.2.1.1.1.0 = STRING: "Cisco IOS Software, 2800 Software (C2800NM-ADVIPSERVICESK9-M), Version 12.4(24)T8, RELEASE SOFTWARE (fc1)
Technical Support: http://www.cisco.com/techsupport
Copyright (c) 1986-2012 by Cisco Systems, Inc.
Compiled Sun 09-Sep-12 04:01 by prod_rel_team"
iso.3.6.1.2.1.1.2.0 = OID: iso.3.6.1.4.1.9.1.576
iso.3.6.1.2.1.1.3.0 = Timeticks: (27513) 0:04:35.13
iso.3.6.1.2.1.1.4.0 = ""
iso.3.6.1.2.1.1.5.0 = STRING: "R1.rmcs.local"
iso.3.6.1.2.1.1.6.0 = ""
iso.3.6.1.2.1.1.7.0 = INTEGER: 78
iso.3.6.1.2.1.1.8.0 = Timeticks: (0) 0:00:00.00
iso.3.6.1.2.1.1.9.1.2.1 = OID: iso.3.6.1.4.1.9.7.129
iso.3.6.1.2.1.1.9.1.2.2 = OID: iso.3.6.1.4.1.9.7.115
iso.3.6.1.2.1.1.9.1.2.3 = OID: iso.3.6.1.4.1.9.7.265
iso.3.6.1.2.1.1.9.1.2.4 = OID: iso.3.6.1.4.1.9.7.112
iso.3.6.1.2.1.1.9.1.2.5 = OID: iso.3.6.1.4.1.9.7.106
iso.3.6.1.2.1.1.9.1.2.6 = OID: iso.3.6.1.4.1.9.7.47
[output omitted]
As you can see snmpwalk is able to extract information from my router. We’ll add the router to a NMS now. I’m using Observium which is an excellent free and open source NMS. If your environment has a lot of Cisco or Linux devices then I can highly recommend to give it a try:

We’ll have to specify our security level, username, password, authentication algorithm, encryption key and protocol. Once the router has been added Observium will be able to extract information from it using SNMP:
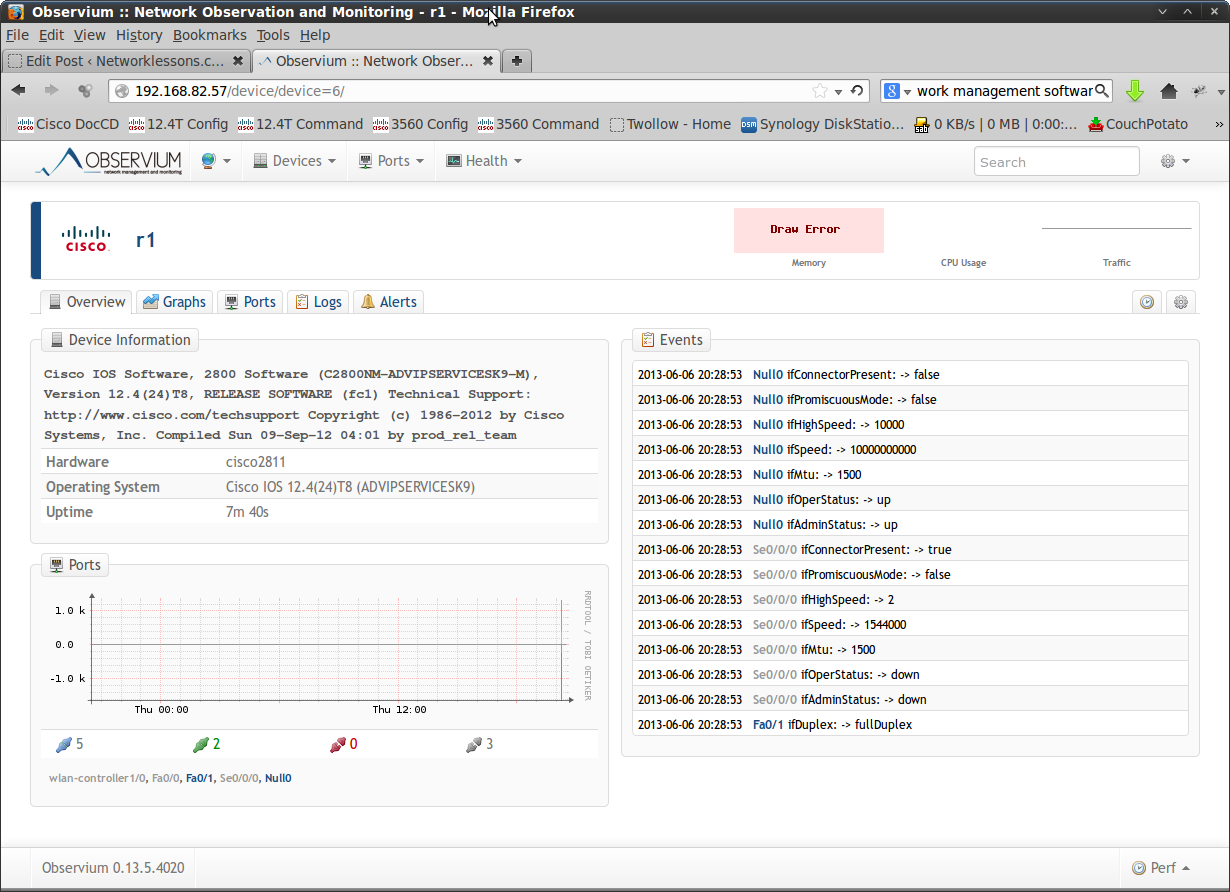
Above you can see that Observium is now monitoring our router using SNMPv3. This should give you an idea of how SNMPv3 works and how to configure it on your Cisco devices.
hostname R1
!
snmp-server group MYGROUP v3 priv
snmp-server user MYUSER MYGROUP v3 auth md5 MYPASS123 priv aes 128 MYKEY12
!
end
If you have any questions just leave a comment.
No comments:
Post a Comment